Ideas

Person applying a new layer of concrete to a residential driveway using a trowel.

All About Concrete Resurfacing

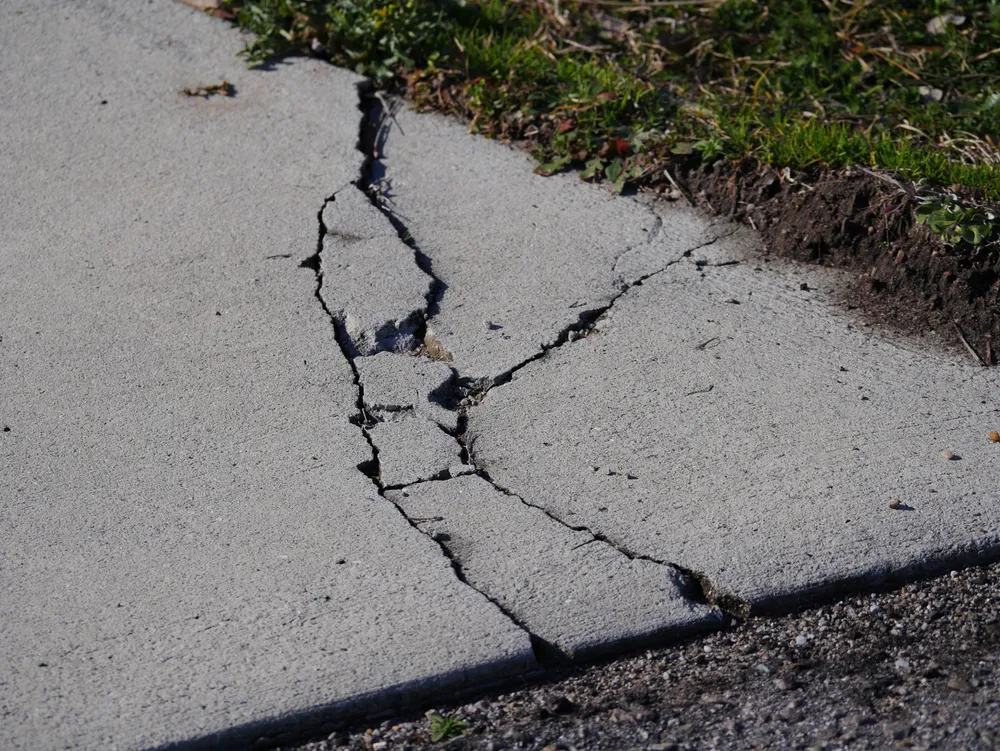
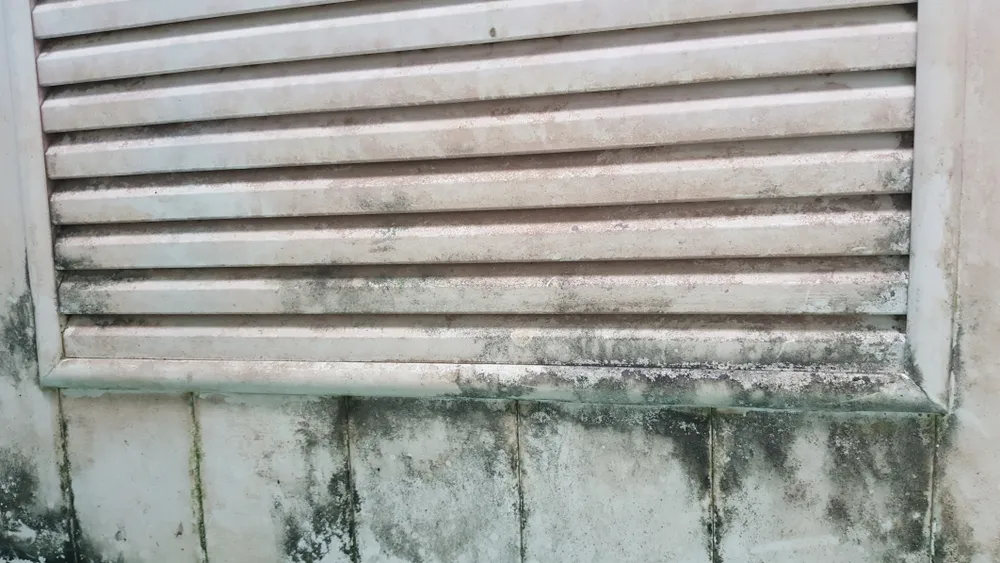
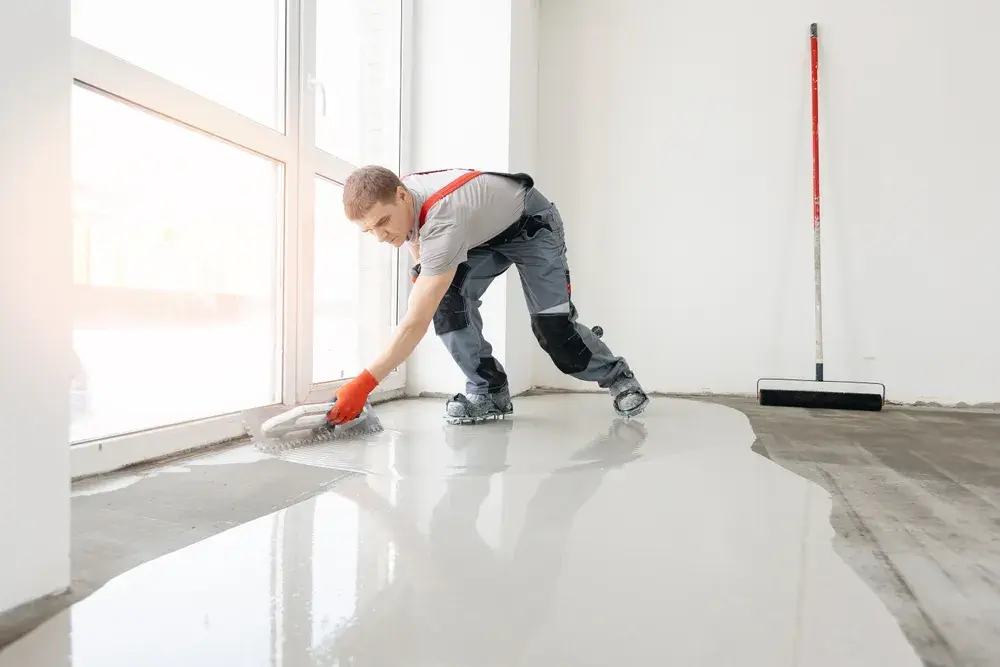
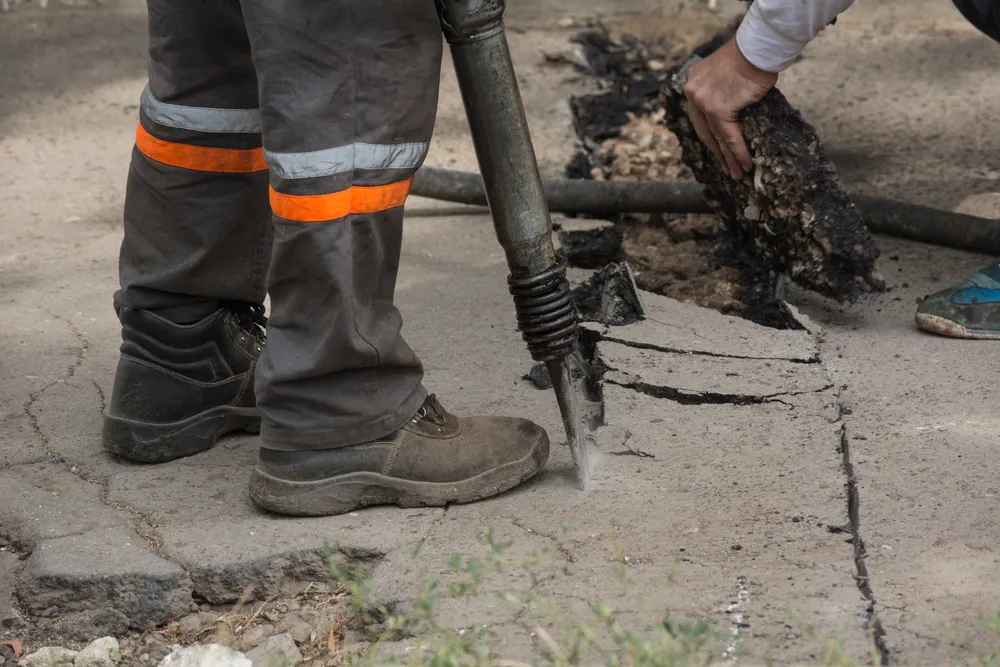
Concrete surfaces are a significant investment in any property, offering durability and a sleek appearance when new. However, over time, even the toughest concrete will show signs of wear and tear, such as cracking, pitting, and discoloration. Concrete resurfacing is not just a maintenance technique but a renovation strategy that restores old concrete to its former glory or even enhances it beyond its original condition. Understanding Concrete Resurfacing What is Concrete Resurfacing? Concrete resurfacing involves covering up an existing concrete surface with a new layer of material, typically a high-quality polymer-modified overlay. This method is perfect for surfaces still structurally sound but cosmetically damaged. The Benefits of Concrete Resurfacing Cost-Effectiveness: Resurfacing is significantly more affordable than tearing out and replacing old concrete. You save on materials and labor and avoid the disposal of old concrete. Time-Saving: Resurfacing projects are usually quick. Most residential jobs can be completed in a couple of days, minimizing disruption to your routine. Aesthetic Flexibility: Modern resurfacing materials come in various colors and textures, allowing customization to fit any design theme. Techniques like stamping or staining can mimic the look of natural stone, brick, and more. Durability: Resurfacing compounds are designed to withstand harsh weather, UV light, and heavy traffic, making them a durable option for restoring old concrete. The Evolution of Concrete Technology The technology behind concrete resurfacing has evolved significantly. Today’s products are far superior in terms of their adhesive qualities, durability, and aesthetic options compared to those available a decade ago. This advancement allows for restoration and customization of the concrete surface at a fraction of the cost of replacement. Comprehensive Benefits of Concrete Resurfacing Environmental Impact: Resurfacing uses less material than replacing the entire slab, making it a more eco-friendly option. Increased Property Value: A well-maintained and visually appealing concrete surface can increase the property value, making it a wise investment for property owners. Safety Improvements: Resurfacing can correct uneven surfaces, reducing trip hazards and improving overall safety. The Process of Concrete Resurfacing Detailed Steps Involved Assessment: A thorough assessment of the existing concrete is necessary to determine if resurfacing is viable. Preparation: The existing surface is prepared by cleaning and repairing any significant cracks or damage to ensure the resurfacing material adheres properly. Mixing and Application: The resurfacer is carefully mixed and applied to the old concrete, where it forms a strong bond that revitalizes the appearance and functionality of the surface. Finishing Touches: Techniques such as texturing or adding decorative patterns are applied before the material sets. Types of Resurfacing Materials Exploring Options Polymer-modified Overlays: These are the most common materials used for resurfacing and are known for their strength and versatility. Stamped Overlays: Ideal for adding a decorative touch, stamped overlays can mimic the look of brick, stone, and other natural materials. Micro-toppings: Offering a more subtle finish, micro-toppings are excellent for indoor surfaces where a complete transformation is not necessary. Real-Life Applications Residential: Driveways, garages, and patios are commonly resurfaced to enhance curb appeal. Commercial: Businesses often resurface walkways, entryways, and parking lots to improve aesthetics and safety. Industrial: In industrial settings, resurfacing is used to repair and strengthen floors that must withstand heavy machinery and high traffic. Beyond Basic Colors and Patterns   Graphic Inlays: Advanced techniques allow for the incorporation of logos and artwork directly into the resurface layer. Reflective Finishes: These can improve lighting in darker areas and add a unique aesthetic element to the surface. Integrated Safety Features: Non-slip additives and reflective markings can be included to enhance safety in high-traffic areas. FAQs What is the best time of year to resurface concrete? A: Spring or fall are ideal, as moderate temperatures ensure proper curing of the resurfacing material. Can resurfacing fix all types of concrete damage? A: Resurfacing is ideal for cosmetic repairs and minor structural flaws. Major issues like deep cracks or foundation problems may require more intensive repairs. How do I maintain my resurfaced concrete? A: Regular cleaning and periodic sealing will protect the surface and extend its life. Avoid harsh chemicals that can degrade the sealant. What are the limitations of concrete resurfacing? A: While versatile, resurfacing cannot correct underlying structural issues, and it requires a relatively intact base concrete to adhere to. How does weather affect resurfacing? A: Extreme temperatures and moisture can affect the curing process and the final outcome. It’s crucial to resurface under optimal weather conditions. Conclusion Concrete resurfacing offers a blend of aesthetic versatility, cost-effectiveness, and longevity, making it an attractive choice for property owners looking to upgrade their concrete surfaces. By understanding the detailed processes and options available, you can make informed decisions about the resurfacing project that best suits your needs. Whether revamping a residential patio or a commercial walkway, concrete resurfacing restores functionality and injects a fresh aesthetic appeal into your property.

All About Concrete Resurfacing Read More »

Tube of concrete caulk for sealing cracks and gaps

What Exactly Is Concrete Culk For?

Concrete caulk is critical for maintaining and repairing concrete structures, ensuring they remain safe and visually appealing. It is vital in filling cracks and gaps, preventing water and debris from causing further damage. Whether for residential driveways or commercial buildings, understanding the proper use and benefits of concrete caulk can save significant time and money in long-term maintenance. Types of Concrete Caulk Concrete caulks vary widely based on their composition and intended use: Polyurethane Caulk: Highly valued for its flexibility and strength, polyurethane caulk adapts to the movements of concrete structures, accommodating shifts without cracking. It’s particularly effective for areas with temperature fluctuations. Silicone-Based Caulk: Renowned for its weather resistance, silicone caulk is ideal for outdoor applications where exposure to rain, sun, and extreme temperatures is common. It does not degrade easily and maintains its elasticity over time. Acrylic Latex Caulk: Known for its ease of use and cleanup, acrylic latex caulk is perfect for indoor applications and small repair tasks. It can be painted over, making it ideal for projects where aesthetics are a concern. Applications of Concrete Caulk Beyond simple crack filling, the strategic application of concrete caulk can enhance the functionality and longevity of concrete structures. Key applications include: Sealing Expansion Joints: Vital for maintaining structural integrity, caulking expansion joints helps accommodate natural concrete movement, thus preventing cracks. Waterproofing: By sealing cracks and joints, caulk prevents water ingress that can lead to significant structural damage over time. Safety Improvements: Filling gaps and cracks eliminates tripping hazards, significantly enhancing safety on concrete walkways and floors. Advantages of Concrete Caulk Utilizing concrete caulk comes with multiple advantages: Preventive Maintenance: It is a barrier against elements that can erode or damage concrete, such as water, ice, salts, and oils. Cost-Effectiveness: Regular use of concrete caulk can defer expensive repairs or replacements of concrete structures. Aesthetic Maintenance: Caulk helps maintain the original appearance of concrete surfaces by preventing the growth of weeds and the accumulation of dirt in cracks. DIY Tips for Applying Concrete Caulk For those looking to undertake caulking as a DIY project, here are some helpful tips: Surface Preparation: Ensuring the crack or gap is clean and dry is crucial for effective caulking. Proper Application: Using a caulking gun can help apply caulk evenly and deeply into the cracks. Curing Time: Allow adequate time for the caulk to cure fully before exposing the area to heavy traffic or moisture. Conclusion Effective use of concrete caulk is essential for anyone looking to maintain or restore concrete surfaces. Its role in extending the life of concrete while maintaining its aesthetic and structural integrity cannot be overstated. As concrete surfaces age and weather, incorporating caulking into regular maintenance routines will ensure they remain robust and attractive for years to come. Whether you’re dealing with a minor sidewalk repair or a major commercial project, the right caulk can make a significant difference. For those new to this aspect of building maintenance, consulting with a professional or referring to detailed guides can provide the confidence to tackle projects effectively.

What Exactly Is Concrete Culk For? Read More »

Concrete Expansion Joint

Choosing The Right Concrete Expansion Joint

When it comes to concrete structures, whether it’s a driveway, sidewalk, or a large commercial building, one term that often comes up is “concrete expansion joint.” But what exactly is it, and why is it so important? Let’s break it down in simple terms. What is a Concrete Expansion Joint? A concrete expansion joint is a gap inserted between sections of concrete to allow for the material’s expansion and contraction. This movement can be due to temperature changes, moisture, or other factors. Without these joints, concrete could crack under the stress of movement, leading to damage and the need for repairs. The Role of Expansion Joints in Concrete The main job of an expansion joint is to prevent cracks. When concrete expands, the joints absorb the expansion and prevent the concrete from pushing against itself or other structures, which could lead to cracking. In colder months, concrete contracts, and the joints accommodate this contraction without the risk of the concrete pulling apart. Types of Concrete Expansion Joints Asphalt Expansion Joints: Commonly used in roads and bridges, these joints absorb thermal expansion and contraction efficiently. Rubber Expansion Joints: These are used in areas requiring a flexible joint material, often found in between sections of buildings, sidewalks, and other structures. Fiber Expansion Joints: Made from fibrous materials, these joints are used in residential and light commercial applications for their cost-effectiveness and ease of installation. Choosing the Right Concrete Expansion Joint Filler Not all expansion joint fillers are created equal. The right filler material will depend on the specific needs of your project. For example, a silicone-based filler might be used for outdoor applications due to its weather resistance, while a polyurethane filler might be chosen for areas that require more flexibility. The key is to choose a filler that can withstand the movements of the concrete without losing its integrity. Silicone-Based Fillers: Known for their flexibility and weather resistance, making them ideal for outdoor applications. Polyurethane Fillers: Offer excellent flexibility and are suitable for areas with significant movement. Foam Backer Rods: Often used in conjunction with sealants, providing a cost-effective solution for filling joints. Installation and Maintenance Proper installation of concrete expansion joints is crucial for their effectiveness. The joints should be placed at specific intervals and depths to allow for optimal movement. Once installed, maintenance involves regular inspections to ensure the filler material remains intact and functional. Over time, the filler may need to be replaced to maintain the joint’s effectiveness. FAQs How often should concrete expansion joints be inspected? Inspection should occur at least annually, or more frequently in areas with extreme weather changes. Can existing concrete structures be retrofitted with expansion joints? Yes, existing structures can be retrofitted, but they require precise cutting and placement by professionals. How wide should concrete expansion joints be? The width can vary based on the concrete slab’s size and the expected range of movement, typically between 1/4 inch to 1/2 inch. Are expansion joints necessary for all concrete projects? While small, residential projects might not always require them, most commercial and public works projects will benefit from expansion joints to prevent cracking and structural damage. How do I know if my expansion joint filler needs to be replaced? Signs include cracking, crumbling, or significant wear in the filler material, indicating it’s time for replacement. Can I install concrete expansion joints myself? For small projects, DIY installation can be feasible with the right tools and materials. However, for larger, more complex projects, professional installation is recommended. Final Thoughts Concrete expansion joints are a vital component of any concrete structure. They play a crucial role in maintaining the integrity and longevity of concrete by allowing for natural movements without damage. By understanding the importance of these joints and choosing the right filler material, you can ensure that your concrete installations remain strong and durable for years to come. Remember, the key to a successful concrete project is not just in the pouring but in the planning and preparation. Including well-designed expansion joints in your project is an essential step in that process.

Choosing The Right Concrete Expansion Joint Read More »

Concrete Porch

7 Cool Ideas for Your Concrete Porch

Sprucing up your concrete porch can significantly improve your home’s curb appeal and create a welcoming space for relaxation. Here are seven straightforward ideas to enhance your porch, incorporating everyday language and focusing on practical improvements. Fresh Paint Job A new coat of paint on your concrete porch can make a huge difference. The change you see in a before and after painted concrete porch is often impressive. Selecting the right concrete porch paint is crucial for a lasting finish. This paint not only updates the look but also protects the surface from weather and wear. Whether you’re aiming for a sleek, modern vibe or a bright, welcoming feel, the color you pick can set the tone for your entire outdoor space. Seeing the before and after-painted concrete porch shows the impact a simple paint job can have. It’s amazing how this straightforward update can make your porch look brand new. When choosing your concrete porch paint, think about the vibe you want to create. A glossy finish might catch the eye, while a matte finish could give a more subdued, elegant look. Stencil Design Adding a stencil design over the new paint on your concrete porch can give it an extra touch of style. This is a chance to get creative and add a personal flair to your outdoor space. You can pick from various patterns that reflect your style, from sophisticated geometric designs to playful floral patterns. Stenciling is a fun weekend project that can take your porch’s look to the next level. Outdoor Rugs Outdoor rugs are a fantastic way to add color, pattern, and texture to your concrete porch without the permanence of paint. They can quickly cover up any existing damage or stains and make the space feel more inviting. When choosing an outdoor rug, look for materials that are durable and easy to clean, such as polypropylene. Consider the size of your porch and the arrangement of your furniture when selecting a rug to ensure it enhances the space without overwhelming it. Outdoor rugs also provide a softer surface underfoot, making your porch a more comfortable place to relax. Plants and Greenery Incorporating plants and greenery can turn your concrete porch into a lush, inviting entryway. Mix and match different types of plants to create visual interest: tall leafy greens for height, flowering plants for color, and low succulents for texture. Consider the light conditions of your porch when selecting plants to ensure they thrive. Adding planters of varying sizes and materials can also enhance the overall look. For a cohesive design, coordinate the color of your planters with your porch’s color scheme. Lighting Good lighting is essential for creating a welcoming atmosphere on your porch after the sun sets. It enhances safety and allows you to enjoy the space into the evening. Solar-powered lights are an eco-friendly option that can be easily installed without wiring. String lights add a festive touch, while lanterns can provide a more traditional look. For task lighting, consider wall-mounted fixtures near seating areas. Choose lighting that complements the style of your home and porch for a unified aesthetic. Furniture and Accessories Selecting the right furniture and accessories can transform your concrete porch into an outdoor living space. Durable, weather-resistant materials like teak, wicker, and metal are ideal for outdoor furniture. Choose pieces that fit the size of your porch and arrange them to encourage conversation and relaxation. Add outdoor cushions and throws for comfort and color. Accessories like outdoor curtains or a decorative screen can add privacy and style. Remember to choose fabrics and materials designed for outdoor use to ensure they withstand the elements. Concrete Porch Goose For a fun and unique touch, consider adding a concrete porch goose to your decor. This quirky addition can be dressed up for different occasions, adding a bit of personality to your porch. A concrete porch goose looks especially charming sitting on a newly painted concrete porch, offering a whimsical greeting to anyone who passes by. FAQs How do I prepare my concrete porch for painting? Clean the surface thoroughly and repair any cracks. Applying a primer designed for concrete can help the paint stick better and last longer. What kind of paint should I use on a concrete porch? Use a paint specifically designed for outdoor concrete surfaces. This type of paint will withstand the elements and foot traffic better than regular paint. Can I put an outdoor rug on my painted concrete porch? Yes, once the paint is fully dry. An outdoor rug can add a splash of color and make the space feel cozier. How do I choose plants for my porch? Consider the light your porch gets and pick plants that will thrive in those conditions. Don’t forget to water them! What’s the best way to light up my porch? Solar lights are an easy, wire-free option. String lights or lanterns can also add a nice touch. Where can I find clothes for my concrete porch goose? You can find outfits for your porch goose at garden centers, online, or in specialty stores. They come in all sorts of styles for every season and holiday. Conclusion Giving your concrete porch a facelift is all about adding touches that reflect your style and make the space welcoming. From the striking difference a coat of paint can make to the charm of a concrete porch goose, these ideas can help you create a space you’ll love. With a bit of effort and creativity, your porch can become a cozy spot for morning coffee or evening chats, showcasing your home’s personality.

7 Cool Ideas for Your Concrete Porch Read More »

Concrete Leveling 101 – How and What

Discover the fundamentals of concrete leveling in this comprehensive guide   If you’re tired of telling your family and friends to watch out for that uneven step or want to make your old driveway look better, concrete leveling could be perfect for you. It’s a cheap way to fix sunken concrete fast. Instead of ripping out the old concrete and putting in new, you can just lift it up to make it safe, level, and nice-looking again, all in a few hours. This article will explain everything about concrete leveling, so you can decide if it’s the right way to fix your concrete. What Is Concrete Leveling   Concrete leveling is a process designed to raise and stabilize sunken or uneven concrete surfaces. Whether it’s a sidewalk, driveway, patio, or basement floor, this technique can effectively address common issues associated with settling concrete. It’s a simple and efficient way to fix those annoying dips and bumps in your concrete surfaces. The Process of Concrete Leveling   Step 1: Assessment The first step in concrete leveling involves a thorough assessment of the affected area. Experienced technicians inspect the site to identify the extent of the damage and determine the best course of action. Step 2: Drilling Holes Once the assessment is complete, technicians drill small holes into the sunken concrete surface. These holes serve as access points for the injection process. Step 3: Injection A specialized mixture, typically consisting of a cement slurry or polyurethane foam, is injected into the drilled holes. This material expands beneath the concrete, lifting it back to its original position. Step 4: Filling and Patching After the concrete is leveled, the drilled holes are filled, and any cracks or damaged areas are patched to ensure a seamless finish. Benefits of Concrete Leveling   Cost-effective Compared to traditional concrete replacement, leveling offers significant cost savings, making it an attractive option for budget-conscious property owners. Time-saving Concrete leveling can be completed in a fraction of the time required for full replacement, minimizing disruption to daily activities. Eco-friendly By reusing existing concrete and minimizing waste, leveling contributes to sustainable construction practices. Common Issues Addressed by Concrete Leveling   Uneven surfaces Sunken or uneven concrete surfaces can create tripping hazards and compromise the aesthetics of a property. Sinking or settling concrete Factors such as soil erosion or poor compaction can cause concrete slabs to sink or settle over time. Safety hazards Uneven surfaces pose a safety risk, especially in high-traffic areas such as sidewalks and driveways. Concrete Leveling Costs Here’s a general pricing estimate for various concrete leveling services offered by See Granny Pro Concrete Solutions: Service Low Range High Range Concrete leveling is a versatile and cost-effective solution for addressing common issues with sunken or uneven concrete surfaces. By understanding the process and benefits of concrete leveling, property owners can make informed decisions to maintain the safety and functionality of their concrete structures. FAQs   How long will the leveling last? The longevity of our concrete leveling solutions depends on various factors, including the method used and soil conditions. However, we aim to provide long-lasting results. What is the best concrete leveling method for my project? The ideal method depends on the specific needs of your project, including the extent of the settlement and the condition of the soil. Our experts can advise you on the best approach. Can all types of concrete be leveled? While concrete leveling is suitable for most situations, severely damaged or crumbling concrete may require different solutions. Is the process environmentally friendly? Yes, our methods are designed to be as eco-friendly as possible, using materials that minimize environmental impact. How soon can I use the area after leveling? Most areas can be used within 24 hours after the procedure, ensuring minimal disruption to your daily activities.

Concrete Leveling 101 – How and What Read More »

Concrete Expansion Joint Fillers

Everything to Know About Concrete Expansion Joint Fillers

Concrete expansion joint fillers are crucial components in keeping the integrity and life of concrete structures, such as driveways, sidewalks, and parking lots. In this comprehensive guide, we’ll explore the importance of expansion joint fillers, how they work, and the different options available to suit your needs. What Are Concrete Expansion Joint Fillers: Concrete expansion joint fillers are materials used to fill gaps or joints in concrete structures, allowing for movement caused by temperature changes, moisture fluctuations, and other factors. These fillers help prevent cracks, spalling, and other forms of damage by accommodating the expansion and contraction of concrete. Types of Expansion Joint Fillers: Polyurethane Sealants: Polyurethane sealants are flexible and durable, making them the best choice for high-traffic areas like driveways and sidewalks. They adhere well to concrete surfaces and provide excellent resistance to weathering and UV exposure. Polyurethane sealants come in various colors to match the aesthetics of the concrete. Silicone Sealants: Silicone sealants offer superior flexibility and adhesion, making them suitable for both horizontal and vertical expansion joints. They have excellent weather resistance and can withstand extreme temperatures without losing their elasticity. Silicone sealants are available in a large selection of colors and are easy to apply. Butyl Rubber Sealants: Butyl rubber sealants are highly flexible and can accommodate significant movement in expansion joints. They provide excellent adhesion to concrete surfaces and are resistant to water and chemicals. Butyl rubber sealants are often used in commercial and industrial applications where heavy-duty performance is required. Cost Considerations: The cost of concrete expansion joint fillers varies depending on the type of material, brand, and quantity needed for the project. On average, you can expect to pay between $1 to $3 per linear foot for polyurethane or silicone sealants. Butyl rubber sealants may be slightly more expensive, ranging from $2 to $4 per linear foot. Keep in mind that labor costs for installation may also affect the overall project cost. Benefits of Using Expansion Joint Fillers: Prevent Cracks and Damage: Expansion joint fillers help reduce the risk of cracks and damage caused by concrete expansion and contraction. Improve Aesthetic Appeal: Fillers come in various colors and finishes, allowing you to enhance the appearance of your concrete surfaces. Extend Lifespan: By reducing stress on concrete joints, expansion joint fillers can help extend the lifespan of your driveway, sidewalk, or parking lot. Minimize Maintenance: Properly installed fillers require minimal maintenance, saving you time and money on repairs in the long run. Installation Process of Expansion Joint Fillers: Proper installation of expansion joint fillers is essential to ensure optimal performance and longevity. The process typically involves the following steps: Preparation: Clean the expansion joints thoroughly to remove debris, dust, and old filler material. Application: Applying a bonding agent or primer to enhance adhesion between the filler and concrete surface. Insertion: Place the expansion joint filler into the prepared joint, ensuring a snug fit without overfilling. Smoothing: Use a tool or trowel to smooth out the filler material and create a uniform surface. Cure Time: Allow the filler to cure according to the manufacturer’s recommendations before subjecting it to heavy traffic or loads. FAQs:   What is the purpose of expansion joint fillers? Expansion joint fillers accommodate the movement of concrete caused by temperature changes and prevent cracks and damage. How often should expansion joint fillers be replaced? Expansion joint fillers should be inspected regularly and replaced if they show signs of wear or deterioration, typically every 5 to 10 years. Can expansion joint fillers be installed DIY? While some homeowners may attempt to install expansion joint fillers themselves, professional installation is recommended for optimal results and longevity. Do expansion joint fillers come in different colors? Yes, expansion joint fillers are available in various colors to match the aesthetics of the concrete surface. Can expansion joint fillers be used in cold climates? Yes, many expansion joint fillers are designed to withstand extreme temperatures and weather conditions, making them suitable for use in cold climates. How long does it take for driveway expansion joint fillers to cure? The curing time for expansion joint fillers varies depending on the material and environmental conditions but typically ranges from 24 to 72 hours. Conclusion: Concrete expansion joint fillers are essential for playing a big part in maintaining structural integrity and the appearance of concrete surfaces. By choosing the right filler and ensuring proper installation, you can protect your driveway, sidewalk, or parking lot from damage and prolong its lifespan. Invest in quality expansion joint fillers today to enjoy long-lasting, durable concrete surfaces for years to come.

Everything to Know About Concrete Expansion Joint Fillers Read More »

spalling concrete

Addressing Spalling Concrete: Causes and Solutions

Spalling concrete can be a frustrating and unsightly issue for property owners. Whether you’re dealing with concrete spalling on your driveway, sidewalk, or other concrete surfaces, it’s essential to understand what causes it and how to effectively address and repair the problem. This comprehensive guide will delve into the world of spalling concrete, exploring its causes repair methods, and providing valuable insights to help you make informed decisions. What Is Spalling Concrete? Spalling concrete refers to the deterioration of concrete surfaces, characterized by the chipping, flaking, or breaking off of small pieces or layers of the material. It often results in a rough and uneven texture, compromising the aesthetics and functionality of the affected concrete. Common Causes of Spalling Concrete Several factors contribute to the development of spalling concrete. Understanding these causes is very important to preventing and addressing the issue effectively: Freeze-Thaw Cycles: In regions with cold winters, repeated freeze-thaw cycles can cause moisture within the concrete to expand and contract. This expansion exerts pressure on the concrete, leading to cracking and spalling. Chemical Deicers: The use of chemical deicers, such as rock salt, on concrete surfaces can accelerate the deterioration process. These chemicals can penetrate the concrete, disrupt its structure, and contribute to spalling. Poor Concrete Mix: Improperly mixed or low-quality concrete is more susceptible to spalling. Inadequate curing and insufficient air entrainment can weaken the concrete’s resistance to external factors. Moisture Infiltration: When water infiltrates the concrete due to cracks or improper sealing, it can erode the internal structure, causing spalling over time. Aging and Wear: Concrete surfaces naturally age and wear over time. Heavy traffic, abrasion, and exposure to the elements can accelerate spalling in older concrete. The Importance of Timely Concrete Spalling Repair Addressing spalling concrete promptly is important to avoid more damage and retain the structural integrity of the affected surfaces. Letting these repairs go unlooked can become more extensive and costly issues down the road. Additionally, repairing spalling concrete enhances safety by eliminating tripping hazards and also improves the aesthetics of your property. Spalling Concrete Repair Methods There are various methods to repair spalling concrete, depending on the extent of the damage. Here are some common approaches: Surface Patching: For minor spalling, surface patching with a suitable concrete repair mix can effectively restore the appearance and functionality of the concrete. Resurfacing: In cases of moderate spalling, resurfacing involves applying a new layer of concrete across the damaged surface. This method provides a fresh and durable finish. Full Replacement: Severe spalling concrete may require full replacement of the affected area. Removing the damaged concrete and pouring a new concrete slab. Crack Repair: Addressing any underlying cracks in the concrete is crucial to prevent further moisture infiltration and spalling. Epoxy injections or other crack repair techniques may be necessary. Approximate Cost of Spalling Concrete Repair The cost of spalling concrete repair can vary widely depending on several factors, including the extent of the damage, the chosen repair method, and local labor and material costs. Here are approximate cost ranges for common repair methods: Surface Patching: $2 to $6 per square foot Resurfacing: $3 to $10 per square foot Full Replacement: $6 to $12 per square foot Crack Repair: $150 to $500 per crack Obtaining quotes from local contractors is essential to get a more accurate estimate for your specific project. FAQs   What is the main difference between spalling concrete and cracking? Spalling concrete involves the chipping, flaking, or breaking off of small pieces or layers of concrete from the surface, while cracking refers to the formation of cracks in the concrete without material loss. Can I prevent spalling concrete on my driveway? Yes, preventative measures include proper sealing, avoiding chemical deicers, and addressing cracks promptly. Is spalling concrete repair a DIY project? While minor repairs can be DIY-friendly, more extensive spalling issues should be addressed by professionals to ensure proper restoration and structural integrity. What is the expected lifespan of repaired spalling concrete? Properly repaired spalling concrete can last for many years, depending on maintenance and environmental factors. Are there eco-friendly options for spalling concrete repair? Some environmentally friendly repair materials and methods are available, so it’s worth discussing eco-conscious options with contractors. Can spalling concrete be a sign of more significant structural issues? In some cases, extensive spalling can indicate underlying structural problems, so it’s advisable to have a professional assessment if you suspect this. Conclusion Addressing spalling concrete promptly and effectively is essential to preserve the appearance and structural integrity of concrete surfaces. Understanding the causes and available repair methods empowers property owners to make informed decisions and maintain the durability and safety of their concrete structures. Whether it’s minor surface patching or full replacement, investing in spalling concrete repair is an investment in the long-term value of your property.

Addressing Spalling Concrete: Causes and Solutions Read More »

Concrete Driveway Repair

The Concrete Driveway Repair Guide

Your driveway is more than just an entrance to your home; it’s a functional and aesthetic part of your property. Over time, concrete driveways may develop cracks and show signs of wear and tear due to various factors like weather conditions and heavy use. However, the good news is that concrete driveway repair is a viable solution that will extend the life of your driveway and upgrade its appearance. In this guide, we’ll explore the ins and outs of concrete driveway repair, including how to repair cracks and the associated costs. When You  Need Concrete Driveway Repair Concrete driveways are durable, but they are not immune to damage. Common reasons for driveway issues include: Cracks: Cracks can develop due to temperature fluctuations, settling, tree roots, or heavy vehicles passing over the driveway. Surface Wear: The surface of the driveway can become worn, leading to an unsightly appearance. Spalling: This happens when the top layer of concrete flakes off, leaving behind rough and pitted surfaces. Stains: Oil, grease, or other substances can leave stubborn stains on the driveway. Addressing these issues promptly through concrete driveway repair can prevent further deterioration and maintain the driveway’s functionality. How to Repair Cracks in Concrete Driveways: DIY vs. Professional Solutions When it comes to concrete driveway crack repair, homeowners have two main options: DIY solutions or hiring professionals. Here’s a brief comparison: DIY Solutions: Suitable for minor cracks and surface wear. DIY kits are available for small-scale repairs. Requires basic tools and materials like concrete patching compound. Cost-effective for minor repairs. Professional Solutions: Recommended for extensive damage, deep cracks, or spalling. Professionals can assess the underlying issues and provide comprehensive repairs. Utilizes professional-grade materials and equipment. More expensive but ensures long-lasting results. How to Repair Cracks in a Concrete Driveway: Step-by-Step Guide For those who choose to tackle concrete driveway crack repair as a DIY project, here’s a step-by-step guide: Step 1: Gather Your Tools and Materials You’ll need safety gear, a chisel, a wire brush, concrete adhesive, a concrete mix, a trowel, and a broom. Step 2: Prepare the Crack Use the chisel and wire brush to clean out the crack, removing loose debris and creating a clean surface. Step 3: Apply Concrete Adhesive Apply a layer of concrete adhesive to the cleaned crack, ensuring it penetrates the surface. Step 4: Fill the Crack Prepare the concrete mix according to the manufacturer’s instructions. Fill the crack with the prepared mix, slightly overfilling it. Step 5: Smooth the Surface Use a trowel to smooth the surface and ensure it’s level with the surrounding driveway. Step 6: Finish and Cure Use a broom to create a textured finish that matches the rest of the driveway. Allow the repaired area to be cured for the recommended time. Factors Affecting Concrete Driveway Repair Cost The cost of concrete driveway repair can vary widely depending on several factors: The extent of Damage: The severity of the damage, whether it’s minor cracks or extensive spalling, will impact the cost. DIY vs. Professional: Hiring professionals for complex repairs will be more expensive than DIY solutions. Materials Used: High-quality materials may come at a higher price. Labor Costs: If you hire professionals, labor costs will be a significant portion of the expense. Location: Local labor and material prices can vary. Estimated Concrete Driveway Cost While the cost of concrete driveway repair can vary, here are some rough estimates: DIY Crack Repair: DIY kits for small cracks can cost $10 to $50, excluding tools. Professional Crack Repair: Hiring professionals for crack repair can range from $300 to $1,500 or more, depending on the extent of damage. Surface Resurfacing: Resurfacing a concrete driveway can cost between $3 to $10 per square foot. Full Replacement: If your driveway requires a full replacement, expect to pay $4,000 to $15,000 or more, depending on size and location. Keep in mind that these are approximate costs, and it’s essential to obtain quotes from local professionals for accurate pricing. FAQs Can I repair small concrete driveway cracks myself? Yes, for small cracks, you can use DIY repair kits. What factors affect the cost of driveway repair? Cost factors include damage extent, materials, labor, and more. How long does repair concrete take to cure? Usually 24-48 hours, but follow product recommendations. Can I prevent future driveway cracks? Regular maintenance, like sealing, helps reduce cracks. How to choose between DIY and professional repair? DIY for minor issues, pros for complex damage. Are there eco-friendly repair options? Yes, eco-friendly products and practices are available. Conclusion Maintaining your concrete driveway through regular inspections and timely repair is crucial for its longevity and appearance. Whether you opt for a DIY approach or hire professionals, addressing cracks and damage promptly can save you money in the long run. Remember to remember the damage’s extent, the location of your driveway, and the materials used when estimating the concrete driveway repair cost. A well-maintained driveway enhances your property’s curb appeal and provides a smooth and safe surface for vehicles and pedestrians.

The Concrete Driveway Repair Guide Read More »

Flood Vents

Flood Vents Facts – Protecting Your Property from Flood Damage

Protecting properties from water damage is a top priority in regions prone to flooding. One effective way to do this is through the use of flood vents. These specialized features are designed to mitigate the severe impact that floods can have on residential and commercial buildings. Understanding Flood Vents: Flood vents are ingeniously designed to allow water to flow through them, equalizing the pressure caused by floodwater on both sides of a building’s walls and foundation. This process is crucial in preventing potentially catastrophic structural damage. By allowing water to pass through, these vents prevent the buildup of hydrostatic pressure that can weaken or even collapse walls and foundations. Types of Flood Vents: Flood vents come in two primary types:  Engineered: Engineered flood vents are designed to open automatically when water reaches a certain level, thanks to their internal mechanisms. This feature ensures a timely response to flooding.  Non-engineered: Non-engineered flood vents are simpler and always open to allow continuous water flow. The two choices often depend on specific building requirements and local regulations. Flood Vents for Garage: When it comes to flood protection, garages are often vulnerable areas. Flood vents for garages are specially designed to address this issue. They provide an additional layer of protection to ensure that floodwaters don’t inundate your garage. By installing these vents in your garage, you can prevent costly damage to vehicles and stored items. Installation and Placement: Correct installation and placement of flood vents are vital for them to function effectively. It’s important to place these vents strategically around the foundation, based on the building’s size and design, while adhering to local building codes. Professional installation is recommended to ensure that the flood vents meet the required standards and are positioned for maximum efficacy. Regulations and Compliance: Flood vent installation is governed by regulations put in place to ensure the safety of structures in flood-prone areas. FEMA provides comprehensive guidelines for flood vent installation, detailed in documents like FEMA’s Technical Bulletin 1 (TB-1). These guidelines are essential for understanding the specific requirements for flood vents in different flood zones. Additionally, the National Flood Insurance Program (NFIP) has established specific requirements for buildings located in Flood Zone A. These requirements include regulations regarding the placement of the lowest finished floor about the Base Flood Elevation (BFE). Furthermore, the NFIP mandates the installation of flood vents in areas below the BFE, including crawlspaces and garages, to alleviate hydrostatic pressure during floods. Impact on Safety and Insurance Rates: Adhering to FEMA and NFIP regulations is critical for ensuring safety during flood events. Buildings equipped with properly installed and compliant flood vents are better prepared to handle flood situations, significantly reducing the risk of structural damage. Moreover, compliance with these regulations can have a positive impact on flood insurance rates. Property owners who invest in flood vent installation may be rewarded with lower premiums due to the decreased risk associated with flood damage. Smart Flood Vents: Innovations in flood protection have led to the development of smart flood vents. These advanced vents are equipped with sensors and technology that allow them to respond intelligently to flood conditions. Smart vent flood vents can automatically open and close, ensuring the most efficient management of floodwater. They can be monitored remotely, providing property owners with real-time information about flood conditions and the status of their flood vents. Benefits of Flood Vents: The installation of flood vents offers several significant benefits. Firstly, flood vents play a vital role in reducing the risk of structural damage during floods. This reduction in potential damage can lead to substantial cost savings in repairs and renovations. Secondly, compliance with flood mitigation measures, such as installing flood vents, can lead to lower insurance premiums. Flood insurance providers recognize the value of proactive measures in reducing the risk of flood damage. Lastly, flood vents can enhance the overall value of a property. Potential buyers and renters are often attracted to properties that are equipped to withstand flood events, making them more resilient against flood damage. Choosing the Right Flood Vents: Selecting the appropriate flood vents involves considering several critical factors. The location of the building, its design, the level of flood risk, and compliance with industry standards all play a role in making the right choice. It’s essential to opt for certified flood vents that meet or exceed regulatory requirements. Doing so ensures that your property is adequately protected and that you are in compliance with local regulations. FAQs: What is the primary function of flood vents? Flood vents are designed to allow water to flow through a building’s foundation during a flood, balancing the pressure and preventing structural damage. How do engineered and non-engineered flood vents differ? Engineered flood vents automatically open in response to rising water levels, while non-engineered vents are always open, allowing for constant water flow. Why is professional installation of flood vents necessary? Professional installation ensures that flood vents are placed correctly and comply with local building codes and regulations, maximizing their effectiveness. How do flood vents impact flood insurance premiums? Properly installed and compliant flood vents can lead to lower flood insurance premiums due to reduced risk of flood damage. Can flood vents be installed in any type of building? While flood vents are beneficial for buildings in flood-prone areas, their installation depends on local regulations, the building’s design, and flood risk levels. What should be considered when choosing flood vents? Considerations include the building’s location, design, flood risk level, and ensuring the vents meet industry standards and regulations. Conclusion: Flood vents and concrete leveling are both crucial elements in flood risk management, particularly in areas prone to such natural disasters. Understanding their types, benefits, and the regulations surrounding them is key for property owners to make informed decisions and safeguard their investments against flood damage. By taking proactive steps, such as installing flood vents and implementing concrete leveling measures, property owners can significantly reduce the impact of floods and protect their valuable assets.

Flood Vents Facts – Protecting Your Property from Flood Damage Read More »

Concrete floor being leveled in a garage renovation project

Different Ways For Garage Floor Leveling

Garage floor leveling is essential for maintaining a safe and functional garage space. Over time, floors can become uneven due to various factors, leading to potential hazards. This guide offers comprehensive steps to level your garage floor for a smooth and durable surface. Identifying the Problem First, identify low and high spots on your garage floor using a straightedge or level. Mark these areas to determine the extent of unevenness and choose the appropriate leveling method. Leveling Techniques Self-leveling Concrete Garage Floor: For minor unevenness, this might be the most accessible and affordable way. Mix the self-leveling concrete according to the manufacturer’s instructions and pour over low areas, and voila, you’re done self leveling garage floor.  Grinding High Spots: Use an angle grinder for high spots, especially where the slab has cracked. This method is effective for significant unevenness. Polyurethane Our Concrete Lifting Technique: A less invasive and cost-effective method. Small holes are drilled, and a two-part epoxy mix is injected, expanding into foam that lifts the concrete. Use of Polyurethane for Leveling Garage Floor: We emphasize the use of polyurethane for concrete leveling. This method is less invasive and more cost-effective compared to concrete replacement. It involves drilling small holes and injecting a two-part epoxy mix that expands into foam, lifting the concrete. This foam is hydrophobic, preventing water infiltration, and it doesn’t fracture or fail, ensuring long-term stability. Process Overview Drilling Holes: Small holes are drilled in the concrete. Injecting Epoxy Mix: A two-part epoxy is injected, which reacts and expands into foam. Lifting and Leveling: The foam lifts the recessed areas, stabilizing the soil underneath. Filling Holes: Injection holes are filled with cementitious grout for a seamless look. Benefits of Polyurethane Leveling Environmentally friendly and safe. Strong, lightweight, and dense. Resistant to moisture and soil chemicals. Reduces the likelihood of new gaps or settlement. Quick curing time (about 15 minutes). Why Choose Polyurethane Leveling? Polyurethane leveling is recommended for its affordability, speed, and effectiveness in preventing future sinking. It’s a durable solution, especially in environments where soil conditions fluctuate. Signs of Garage Floor Issues Misaligned garage frame or roof. Cracks or bowing in interior or exterior walls. Stair-step cracks in exterior brickwork. Exterior walls separate from the main house. Problems with garage windows and doors. Cost Effectiveness The cost of polyurethane leveling compared to concrete replacement is significantly lower. It’s a quick process, usually completed in less than a day, saving both time and money. Environmental Safety The polyurethane used is non-toxic and safe for the environment, even in potable water. It forms an impermeable, solid structure, ensuring durability and safety. Noise Level The process is not excessively loud, making it less disruptive. Customized Approach Each project is assessed individually, with the amount of polyurethane injected tailored to the specific needs of the garage floor. FAQs   What causes garage floors to become uneven? Uneven garage floors can result from soil settlement, poor initial installation, water damage, or natural shifting of the ground. Is it possible to level a garage floor by myself? Yes, for minor leveling tasks, using self-leveling concrete is manageable. However, for more significant issues, professional assistance is recommended. How long does it take for leveling compounds to dry? Self-leveling compounds typically dry within a few hours, but it’s best to wait 24 hours before heavy use. Polyurethane foam cures even faster, often within 15 minutes. Are there environmentally friendly options for garage floor leveling? Yes, certain polyurethane foam products are environmentally friendly and safe, even for use in potable water. Can all types of unevenness be fixed with leveling? Most types of unevenness can be addressed with leveling techniques, but extremely damaged floors might require more extensive repair or replacement. What is the best method for leveling a severely uneven garage floor? Polyurethane our concrete lifting technique or professional mud jacking might be the most effective solution for severe unevenness. Conclusion Polyurethane concrete leveling is a modern, effective solution for garage floor leveling. It offers numerous benefits, including environmental friendliness, cost-effectiveness, and durability. Recognizing early signs of floor sinking and opting for this method can save significant time and money in the long run.

Different Ways For Garage Floor Leveling Read More »